
Falcon BMS

Please note:
*Configuration guidance provided is for Windows Operating Systems. Mac OS X testing in process.
*It is recommended to set your desktop background to solid black since your HUD monitor becomes
an extension of your desktop area. Not all HUD images fill the HUD's internal monitor screen completely
and desktop background images & colors will be visible around exported HUD images.
Configure Display Settings
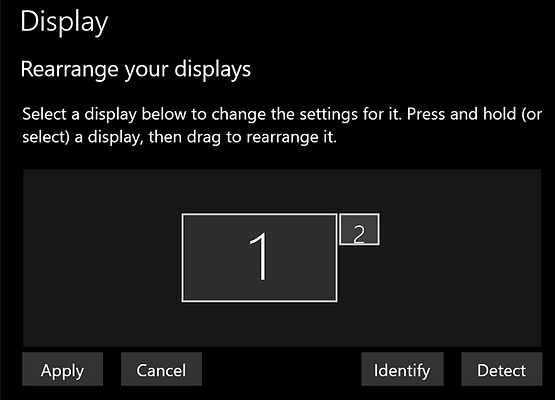
1. With your DT1, SC1 or SC2-6 connected, right-click on your desktop and choose 'Display Settings'.
2. Move your HUD monitor to the upper right side of your main monitor as shown (monitor 2 in this example).
3. Click 'Apply' to save the monitor positions. The following instructions rely on this arrangement for HUD export/placement on the same computer.
Configure Falcon BMS
1. Instruct Falcon BMS to export displays: Open the file 'Falcon BMS.cfg'. The default file location is C:\Falcon BMS 4.37\User\Config.

2. Edit the line 'set g_bExportRTTTextures 0' and change it to '1' as shown below then save the file.

3. Instruct Falcon BMS to export the HUD including its location & size. Open the file 'RTTClient.ini'. The default file location is C:\Falcon BMS 4.37\Tools.

4. Change 'USE_HUD = 0' to '1' and add the following lines as shown (for the monitor arrangement specified in Steps 1-3):
HUD_X = This is the coordinate from the left side of your main monitor. It should exceed your main monitor's width in pixels so the HUD appears on your DT1, SC1 or SC2-6 (In this example the main monitor is 2650 pixels).
HUD_Y = This is the coordinate from the top of both your main monitor and DT1 or SC1.
HUD_W = HUD width in pixels.
HUD_H = HUD height in pixels.

5. Save the file, open the Falcon BMS Launcher and click on 'RTTR Client (Display Extraction)'.

A new window will appear at the coordinates and size you specify in Step 4.

6. Launch Falcon BMS and load a flight.
-Press the '1' key for the 'HUD Only' view.
-Press 'Alt + C', then 'H' to remove the HUD from your main monitor view.
-Press 'Alt + H' to change the HUD's color if you so choose.

7. Adjust the HUD size and position as outlined in Step 4 until the desired result is achieved. Close RTTR Client and reopen it for the new settings to take effect.